
To get motion blur in photos, use a shutter speed of 1/15s to 1/2s, then either hold the camera still so the background stays sharp and moving people blur, or pan with the subject so they stay sharp and the background streaks. Slower shutter speeds give more blur. Faster subjects need less time.
Motion blur photography is one of the simplest ways to capture movement in a still image. I'm Olivier Duong. I'm not a slow shutter photographer by habit, but some places beg for it. The eye is drawn to movement. Blur you choose creates an instant point of interest in a frame. Blur you didn't choose ruins the frame. This guide is about the first kind, and how to stop the second.
What is motion blur in photography?
Motion blur is the streak you get when something moves while the shutter is open. A moving object leaves a trail. Everything that holds still stays sharp. If the subject moves, the subject blurs. If the camera moves, everything blurs.
Fast shutter speeds, like 1/1000s, freeze movement: a person frozen in time. A long shutter speed records it. That is the whole principle behind motion photography: the longer the time the shutter is open, the more of the movement ends up in the picture. The slower your shutter speed, the more blur. You are deciding how much time goes into one frame.
The same physics gives you star trails in night sky photos and silky water in landscapes. On the street, the subject is people, and blur is a way to tell a story about the rush of a crowd or the calm person in the middle of it.
In street photography, blur does two jobs. It gives a sense of movement and speed that a frozen frame can't show, and it separates the one sharp thing in a frame from everything that isn't. A still person in a blurred crowd tells a story on its own. Blur can convey a sense of emotion too, like hurry or loneliness.
Camera settings to capture motion blur: cheat sheet
What shutter speed creates motion blur depends on how fast the subject moves and how far it is from you. Use this table as a starting point, then go one stop slower or faster:
| Effect | Shutter speed | Camera | Aperture and ISO |
|---|---|---|---|
| Walking people blur a little, still scene sharp | 1/15s to 1/30s | Still, braced | f/8, lowest ISO |
| Walkers become ghosts | 1/4s to 1/8s | Still, braced or on a wall | f/11 to f/16, lowest ISO |
| Crowds turn into a flowing river | 1/2s to 2s | Tripod or ledge | f/16, ND filter in daylight |
| Panning a walking person | 1/8s to 1/15s | Pan with the subject | f/8, low ISO |
| Panning a cyclist | 1/30s | Pan with the subject | f/8 to f/11 |
| Panning cars | 1/60s to 1/125s | Pan with the subject | f/8 to f/11 |
| Flash plus slow shutter | 1/8s to 1/15s | Still or moving | f/5.6 to f/8 |
| Intentional camera movement | 1/4s to 1s | Move on purpose | f/11 to f/16 |
Set your shutter speed first. Use shutter priority mode, or manual mode with the ISO set low. Keep an eye on overexposure: a long exposure time in daylight lets in a lot of ambient light. In bright light you'll run out of aperture before you reach a slow enough shutter, which is where a neutral density filter comes in (see below). For the rest of the camera setup, use my street photography settings cheat sheet.
How to create motion blur: hold still and let the subject blur
Keep the camera still and set a slow shutter. The street stays sharp and the people moving through it blur. This is the easiest motion blur effect to get right: a sharp image of the place, with a bit of blur wherever the subject is moving.
- Find a stage. A crossing or a station entrance, somewhere people move through and the background is worth keeping sharp.
- Brace the camera. Lean it on a wall or a ledge. Image stabilization helps you hand hold 1/15s or slower, but only for camera shake.
- Pre-focus. Focus on where the subject will be, or on a still subject in the crowd, and lock it.
- Press the shutter button gently when the subject enters the frame, and keep still until the shutter closes.
- Take many frames. Blur is unpredictable. The amount changes with every step.
A tripod gives you the sharpest background and the longest exposures. It is also slow and visible on the street. For long exposure photography of crowds, find a ledge instead, or go early when fewer people care.
ND filters. A neutral density filter is a photographic filter, dark glass that screws on the front of the camera lens and decreases the amount of light reaching the sensor, so you can use a slow shutter in daylight. A 3-stop ND turns 1/125s into 1/15s. A 6-stop ND turns it into 1/2s.
Panning photography: move the camera with the subject
Panning means following your subject with the camera during the exposure. The subject stays fairly sharp and the background turns into horizontal streaks. It gives the strongest sense of speed, which is why sports photography uses it so much. Instead of freezing the action, you get a blurred background and a subject that seems to fly.
- Start early. Pick up the subject before they reach you and track them in the viewfinder.
- Move with your hips, not your arms. Stand with feet apart and rotate your upper body smoothly.
- Use continuous autofocus or pre-focus on the spot where they will pass.
- Press the shutter while moving and keep following your subject after the click. Stopping at the click is the most common mistake.
- Shoot a burst. Even pros keep only a few frames from a panning sequence.
Cyclists and scooters are the best practice subjects. They move at a steady speed on a predictable line. Try 1/30s, then 1/15s once you get sharp results. Walking people are harder because their arms and legs move in different directions, which is often what makes the shot.
Use motion blur with flash: dragging the shutter
Combine a flash with a slow shutter speed and you get two images in one: the flash freezes the subject and the long exposure blurs everything else. Photographers call it dragging the shutter.
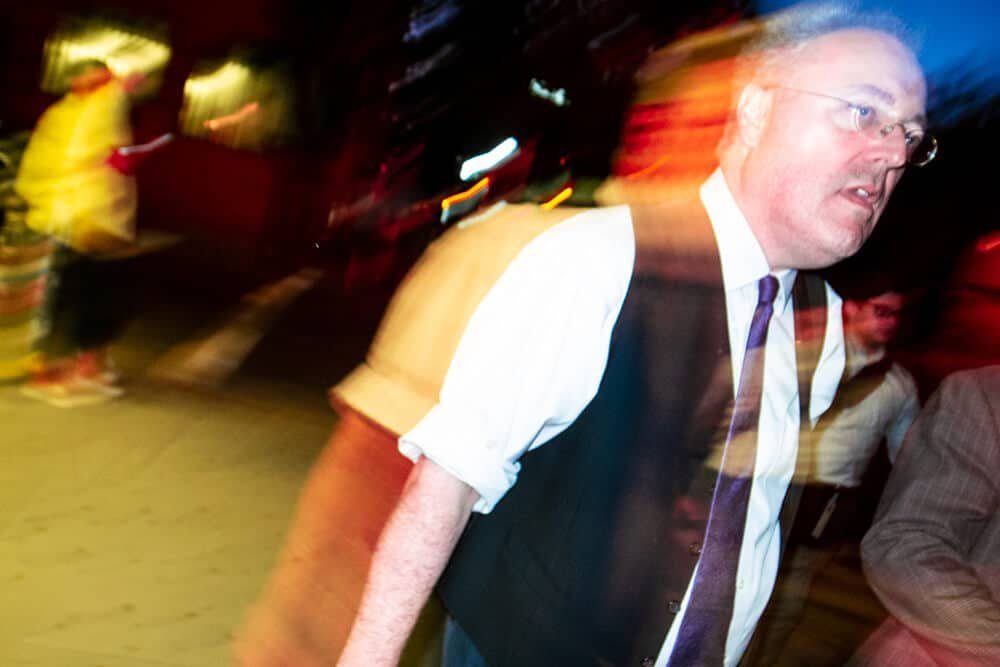
It was my favorite trick as a wedding photographer to liven up a dull ballroom, and it works just as well on a street at night. Set 1/8s to 1/15s, f/5.6 to f/8, and a small flash at low power. Move the camera slightly during the exposure for extra streaks.
Set the flash to rear curtain sync if your camera has it. The flash fires at the end of the exposure, so the trail sits behind the moving subject instead of in front. More on the flash side in flash street photography.
Intentional camera movement and zoom blur
Intentional camera movement (ICM) means moving the camera on purpose during a long exposure, so the whole photo becomes brush strokes of light and color. Zoom blur is the same idea with a zoom lens: twist the zoom ring during the exposure and lines rush out from the center.
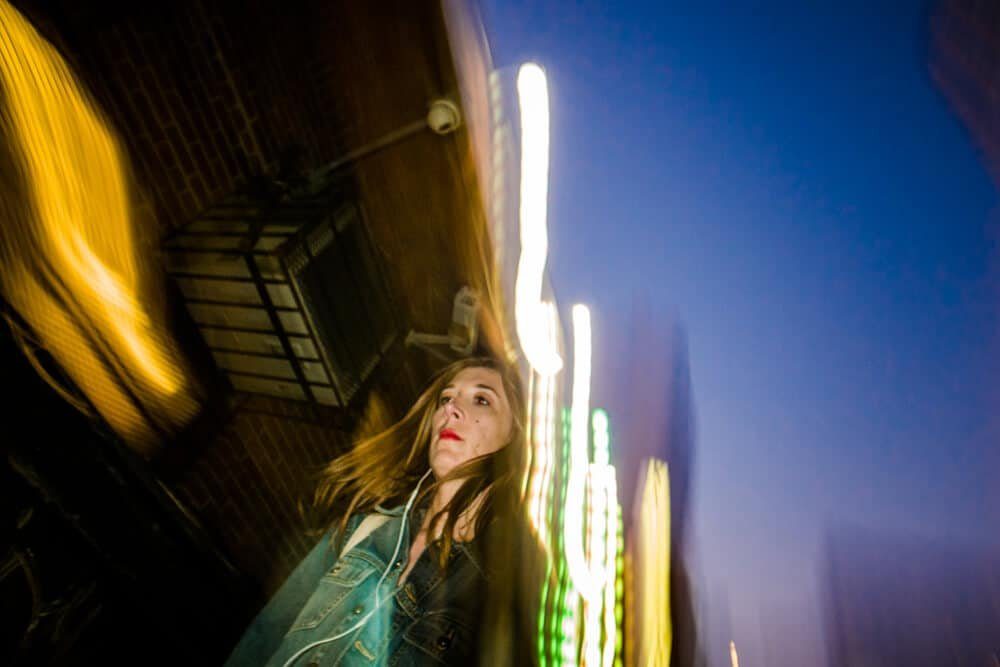
ICM works best with strong color and contrast: neon signs or crowds in bright clothes. Start at 1/4s and move in one direction, like a vertical sweep. Most frames fail, and that's normal. Ernst Haas made this kind of color and movement into an art form in the 1950s, most famously in his bullfight pictures. I wrote about how he did it in my Ernst Haas profile.
Why are my photos blurry? Fixing accidental motion blur
If your photos are blurry and you didn't want them to be, your shutter speed is too slow for the subject or for your hands. On Reddit, beginners say it plainly: "I have a ton of shots like this where my shutter wasn't fast enough."
There are two kinds of accidental blur, and they have different fixes:
- Camera shake. The whole frame is soft. Rule of thumb: hand hold no slower than 1 over your focal length (1/30s with a 28mm lens), or slower with image stabilization.
- Subject motion. The background is sharp but people are smeared. Stabilization doesn't help here. You need 1/250s to be safe with people walking, and 1/1000s for runners and cyclists.
The fix for both is the same setup: manual mode or aperture priority with a minimum shutter speed of 1/250s, and auto ISO to cover the light. At night you'll hit the limits faster, so read night street photography for how to trade ISO against shutter speed. Photoshop has a Motion Blur filter and Path Blur, but blur added in post rarely looks like the real thing, and removing real blur is nearly impossible.
Street photographers who photograph motion
Study photographers who treat blur as their main material:
- Ernst Haas. Slow shutter color in New York and in the bullring. Blur as painting.
- Alexey Titarenko. His series City of Shadows (1991 to 1994) used long exposures of crowds near a St. Petersburg metro station, so people dissolve into a flowing mass. The series is on his website.
- Brassaï. His night pictures of Paris needed exposures of minutes, so anything that moved simply vanished. See my Brassaï profile.
- Your own archive. Look through your rejects. Some blurry frames you deleted might be better than the sharp ones you kept.
Blur is a tool, not a style on its own
A blurry photo of nothing is still a photo of nothing. Blur works when it serves a picture that already has a clear subject and a reason to look.
That is what my online street photography course is about: seeing picture patterns and building strong compositions, whatever your shutter speed. It includes a Photography Basics bonus that explains how settings like shutter speed change the image. If you want the exposure side from scratch, learn the sunny 16 rule first. Then slow down on purpose.
Frequently Asked Questions
What shutter speed creates motion blur?
Anything slower than the subject needs to freeze. For people walking, blur starts around 1/60s and gets strong at 1/15s to 1/4s. For cars you see blur even at 1/125s. For flowing crowds or water, use 1/2s to several seconds with the camera on a tripod or ledge, and a neutral density filter in daylight.
How do you get motion blur in photos?
Set a slow shutter speed, usually 1/15s to 1/2s, in shutter priority or manual mode with a low ISO. Then either keep the camera still so moving subjects blur against a sharp background, or pan with the subject so it stays sharp and the background streaks. Take many frames, because every exposure blurs differently.
What is panning in photography?
Panning is moving the camera to follow a moving subject during the exposure. With a shutter speed around 1/15s to 1/60s, the subject stays relatively sharp and the background becomes horizontal streaks, which shows speed. Rotate from the hips and keep moving after you press the shutter.
Is motion blur bad in photography?
Only when you didn't choose it. Accidental blur from camera shake or a slow shutter ruins detail. Deliberate motion blur adds a sense of movement and time that a frozen frame can't show. The best blurred photos usually keep one element sharp, so the eye has somewhere to land.
Can you add motion blur in Photoshop?
Yes. Adobe Photoshop has a Motion Blur filter and Path Blur in the Blur Gallery, and you can mask them onto the background. It rarely looks as convincing as real motion blur, because real blur follows the actual movement and light. Shooting it in camera is faster and teaches you more.