
To edit street photography, straighten the frame, set exposure and white balance, add a little contrast, then stop. The edit serves the moment, and if a photo needs heavy processing to work, the problem is the photo, not the edit.
I'm Olivier Duong. Post-processing doesn't create your photograph, it realizes it. If your image has nothing in it, no amount of editing will save it. It's like putting perfume on a pig. But if the image already has everything it needs, editing is mostly an act of bringing out what is already there. This is the post processing workflow I use in Adobe Lightroom, and these editing tips work the same in most photo editing software.
How much editing is there in street photography?
Most good street photography is lightly edited: crop, exposure, contrast, color or a black and white conversion, and some local dodging and burning. What people usually don't do is add or remove things, because the genre's value is that the moment was real.
On Reddit, one well upvoted reply to a beginner's post read: "The level of processing is quite horrific I'm afraid. Crank that waaaaay down." That's the usual failure. Too much clarity, saturation cranked up, HDR halos, heavy vignettes. The photo stops looking like a street and starts looking like a filter.
So how much editing is too much? My rule: every adjustment has to help the viewer see the moment. If a slider only makes the image look "edited," undo it.
Removing a stray bag at the edge or a small sensor dust spot is fine for most people. Using generative AI to remove a person or add a sky is a different story. It turns a street photograph into a digital illustration, and many street photography contests forbid it. Keep your edits to tone and color, and let the content stay what you saw.
Step 1: cull your street photography images before editing
The best editing tip I know is to edit fewer photos. Pick your best photo from each scene first, then edit your photos only from that short list.
In Lightroom Classic, go through the shoot in the Library module and press P to flag a pick and X to reject. Use star ratings for a second pass. Be ruthless: of the street photography shots from a full day, a handful might be worth your time. I talk about why that's normal in my guide to street photography hit rate.
Culling is also where you learn. Looking at why one frame of a scene works and the next one doesn't teaches you more than any slider. My guide on why street photos look boring covers what to look for.
A simple Lightroom workflow for editing street photography: crop, sliders, mask, vignette
I follow the same editing process for every picked frame, in this order. Once it's a habit, most images take a minute or two.
- Crop and straighten. Fix crooked horizons and verticals first. Crop to remove distractions at the edges, but don't crop so tight that you lose the context of the street.
- Choose a profile and set white balance. Adobe Color or a camera profile for color, a black and white profile for monochrome. Set the temperature for the mood you want, not only for accuracy.
- Exposure adjustments. Set exposure for the subject. Then pull highlights down and lift shadows only as much as you need. Set whites and blacks so the image has a true bright point and a true dark point.
- Contrast and clarity, a little. My beginner formula: ramp up the contrast a bit and the clarity slider a bit. That alone makes most images pop. Too much clarity makes faces look crunchy, so stay gentle.
- Color or black and white. In the HSL / Color panel, calm down any color that distracts from the subject. Use the Color Grading panel (colour grading, if you spell it the British way) to tint shadows and highlights if you want a look. For monochrome, use the B&W mix.
- Direct the eye with a mask. Use Masking (Select Subject, brushes, linear and radial gradients) to lighten the subject and darken the rest. This is dodging and burning, and it matters more than any global slider.
- Vignette and noise reduction. A light vignette holds the eye in. Apply noise reduction to high ISO files. Some people prefer the grain slider to fake the texture of film photography instead. Then sharpen for your output size.
- Compare and export. Press the backslash key in the Develop module to see the before and after. If the before looks more honest, pull back. Then export the final photo.
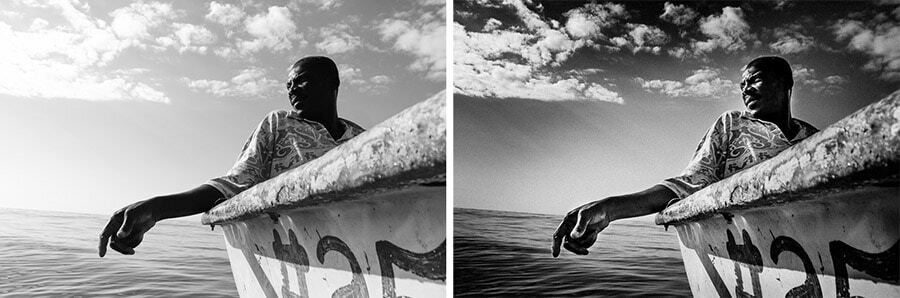
Everything else is refinement of tonal values and color. For the colour-to-gray side in detail, read my black and white photography guide.
Post-processing to direct the eye: mask, dodge and burn
Post-processing isn't only about making images look good. It's about commanding the gaze of your viewer. As a street photographer you are the director of the image, and a director controls what the audience sees, and when. Without that control, a picture is just a snapshot.
You do your best to get everything right in camera, but a street photo rarely makes the cut in its original state. There are too many moving pieces. The eye travel isn't there yet. So you guide it:
- Brighten the subject and darken the background, since the eye goes to the brightest parts of the image first.
- Burn down distractions like bright signs or white shirts at the edge of the frame.
- Desaturate colors that compete with the color that matters.
- Keep the brightest, sharpest part of the image where you want the viewer to land.
Psychology plays a big part here. Your real canvas is the viewer's mind. Change the color temperature and you change the feeling of the image. Warm reads as nostalgic, cool as distant.
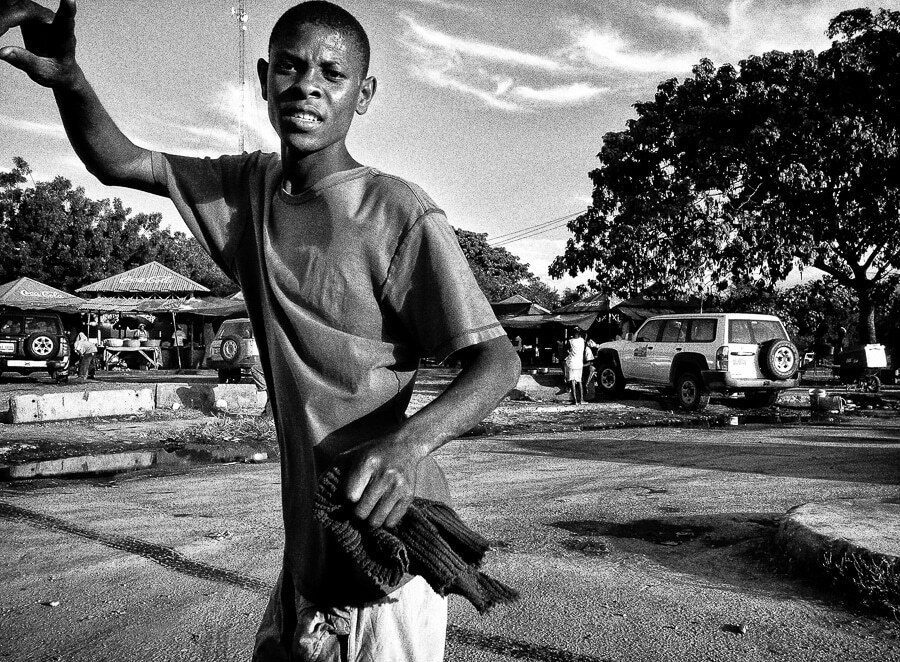
This is the same thinking as composition, done after the fact. My guide to photography composition explains the principles you are reinforcing.
Lightroom presets for street photography: help or crutch?
Presets are useful for a consistent look across a set, and they save time. They can't fix a weak photo, and nobody else's preset will give you a style.
Full disclosure: Inspired Eye, my old site, sold street photography presets. So I'm biased, and I also understand the distrust. One Reddit comment said "Selling presets it the first red flag of a shitty photographer." Presets get sold as shortcuts to good photos, and that's a lie.
How I use them:
- Treat a preset like a film stock. Film photographers picked Tri-X or Portra and knew exactly what they'd get. Pick one preset and stick with it.
- Use one lens and one preset until you master them. After years with the same black and white preset, I know the outcome before I shoot. The processing becomes part of how you see, and you can previsualize the final image.
- Adjust after applying. A preset is a starting point. Exposure and white balance still need setting per image.
- Make your own. Once you find settings you like, save them as a preset. That's how you build your own look.
Presets also help you see old photos fresh. Browsing your catalog with a few looks applied can show you a frame you passed over years ago. A "film look" in Lightroom works the same way: faded blacks and a little grain. If you'd rather do it in camera, my Fujifilm recipes are presets built into the camera.
Color grading street photos for a cinematic look
Color grading means shifting the colors of the whole image toward a look, like teal shadows and warm skin. It's how movies get their mood, and it works on street photos if you keep it subtle.
Movies never look like real life. They have been processed to look a certain way. For a cinematic street photo, focus on the Tone Curve and the Color Grading panel, plus some contrast and saturation. You can adjust color in the curves by working on the red, green and blue channels separately. Some photographers add a letterbox crop in Photoshop to finish the movie-still effect.
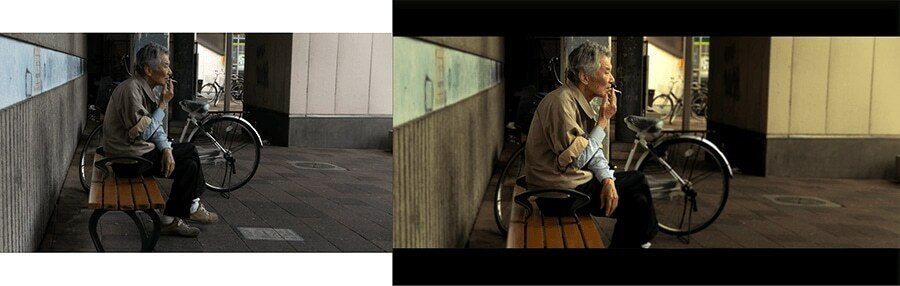
When you find a grade you like, save it as a preset and reuse it. For more on using color deliberately, read my color photography guide.
Editing without Lightroom: phones, free software and Photoshop
You don't need Lightroom to edit street photography well. The steps above work in any editor with exposure, contrast, color and local adjustments.
| Editing tool | Good for | Note |
|---|---|---|
| Adobe Lightroom Classic | Culling and editing large shoots, with a catalogue | Subscription from Adobe Inc. |
| Lightroom mobile | Editing on mobile phones | Syncs with desktop if you subscribe |
| Adobe Photoshop | Layers and detailed retouching | More than most street photographers need |
| Capture One | Strong color tools, tethering | Paid, popular with pros |
| darktable | Full RAW workflow | Free and open source |
| Snapseed | Quick phone edits with local adjustments | Free |
Pick one and learn it deeply. Switching software every month is the editing version of gear acquisition syndrome. YouTube tutorials are fine for learning where the buttons are, but the editing decisions come from your eye.
Common editing mistakes: the clarity slider, vibrance and sharpness
| Mistake | Fix |
|---|---|
| Crunchy HDR look from maxed clarity and shadows | Keep clarity under about +20 and let shadows stay dark |
| Oversaturated colors | Lower saturation, raise vibrance only a little |
| Yellow "piss filter" cast | Cool the white balance or use Color Grading more gently |
| Flat, muddy black and white | Set true blacks and whites, use the B&W mix |
| Heavy vignette you can see | Use a vignette the viewer feels but doesn't notice |
| Crooked horizon | Straighten first, always |
| Editing 200 photos from one walk | Cull to the best few before touching a slider |
Most of these come from one habit: editing to rescue a photo instead of to finish one.
In-camera choices that make editing easier: RAW image, ISO and shutter speed
Editing is easier when the file is right in-camera. A correct exposure and a sharp subject leave you free to make creative choices instead of repairs.
- Shoot a RAW image, not only JPEG. RAW digital images keep far more data. You can recover shadows and fix white balance without the image falling apart.
- Expose for the highlights. You can underexpose a little and lift the darks later, but blown highlights are gone for good.
- Choose shutter speed before ISO. Motion blur from a slow shutter speed can't be fixed in editing. Noise from high ISO can be reduced.
- Pick an aperture with enough depth of field. No slider adds focus that wasn't captured.
On a Nikon or a phone, the same rule holds: get the moment and a usable exposure, and editing will enhance the image instead of saving it. My street photography settings guide covers the numbers.
Learn to edit like the pros
Editing is quick once you know which few tools matter. My street photography course covers how to edit your images like the pros, with the very simple tools you will edit with 95% of the time. It also includes a recorded shooting demonstration where you follow me back to the computer to see the editing process, and how I cull to show only my best images.
Frequently Asked Questions
How much should you edit street photography?
Lightly. Most strong street photos only need a crop or straighten, exposure and white balance, a little contrast and some local dodging and burning. Edit until the subject stands out, then stop. Avoid adding or removing people or objects, since the value of street photography is that the moment really happened.
What is the best software to edit street photography?
Adobe Lightroom is the most common choice because it combines culling and editing in one place. Capture One is a strong paid alternative, and darktable is free. On a phone, Lightroom mobile and Snapseed both handle RAW files and local adjustments. The software matters less than learning one tool well.
Should I use Lightroom presets for street photography?
Presets are fine as a starting point and for keeping a consistent look across a set. Pick one and stick with it so you learn what it does, then adjust exposure and white balance per image. A preset cannot fix a weak photo. The best presets are usually the ones you save from your own edits.
Should I shoot RAW for street photography?
Yes, if your camera allows it. RAW files keep more information, so you can recover shadows and convert to black and white with full control. If you prefer finished JPEGs, set a look you like in camera, such as a Fujifilm film simulation, and keep it consistent.
Is it okay to edit street photos in Photoshop?
Yes, for tonal and color work like dodging and color grading. Photoshop is also handy for letterbox crops. Most street photographers avoid adding or removing elements, and many contests ban it, because street photography is valued as a record of a real, unstaged moment.